 Decision making can be a challenge in any strata corporation; especially when investing significant funds into maintenance such as an exterior re-painting project. Here is some friendly advice to get started and provide your council with a solid foundation for your planning.
Establish a Scope of Work
A proper scope of work means determining what needs to be painted and what does not. Having clear consensus from council before calling contractors will save time and money. There are painting inspectors who can help you decide what to re-paint and which products to use (search online for Painting Inspectors in your area or call us for info on who we see in the market). If your strata decides to establish the scope of work on your own, the first step is to review your existing surfaces and note any areas of concern. Use the following checklist to help ensure you cover all the areas.
One way we’ve found helpful to assess 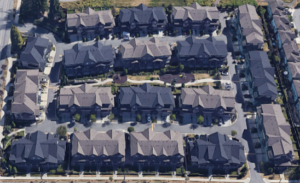 a property is to print out an overhead from Google Maps. Then during a comprehensive 1- 2 hour walk around the property, make notes on the sheet about the affected areas.
Walk-through Checklist
Here is a list of common surface types to consider for re-painting and possible repair:
- wood siding
- composite siding
- vinyl siding
- stucco
- concrete
- brick
- soffits
- fascia & trim
- wood windows
- decks/patios
- railings
- metal surfaces
- light standards
- pillars
- shakes
- doors/frames
- garage doors
- metal Cladding
- privacy fencing
- perimeter fencing
- decorative features
- other
Other considerations are:
- existing leaks
- balcony membranes
- window perimeters
- sealant repairs
- wood trims
- metal flashings
- attachments
- roof membrane
Prepare a budget and plan to raise funds
It is always best practice to start planning early and give yourselves ample time to make your decisions. In some cases, this means 1-2 years before the project, in other cases 6 months can be enough time.
If you’ve taken the time to get council consensus on the scope of work, then getting a budget quote will be fairly simple. It will also be more useful because it will be an accurate amount to use for planning and approval. Remdal often provides budget quotations for projects.If you need assistance with a budget quote, we have estimators available to help you.
And now that you have a better idea of the amount of money required, your focus can turn to raising funds though your Contingency Reserve fund (3/4 vote), Special Levy (3/4 vote) or from a Depreciation Report (majority vote). This is a choice that varies from one strata to another depending on many factors.
Next steps
Over the following months you will want to give your project the best opportunity for success, but taking some additional steps including:
- building a strong business case for owners;
- assessing and choosing your colours;
- inviting qualified painting contractors;
- evaluating and selecting the best proposal;
- identifying best practices to help the job go smoothly;
- the science of finishing well.
We’ll cover these items in upcoming blogs.
Looking for assistance with a project, a second opinion, or a budget quote? Contact us here:
The post Preparing your strata for an exterior painting project appeared first on Remdal.
from Remdal https://ift.tt/2PiFREW
 We all want to do our best for the environment. In our daily lives that begins with household recycling and garbage.